小服AI
Octave(鹰图软件)
每周微课
Octave Forte 3D


从Octave Forte 3D(原Intergraph Smart 3D)2018开始,Forte 3D新增了一个功能,可以使用Composed Drawing输出光栅布置图。
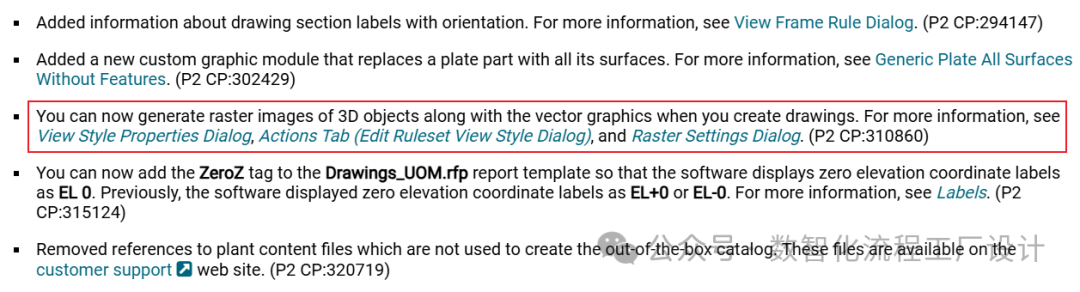
本期微课将介绍具体的设置和步骤
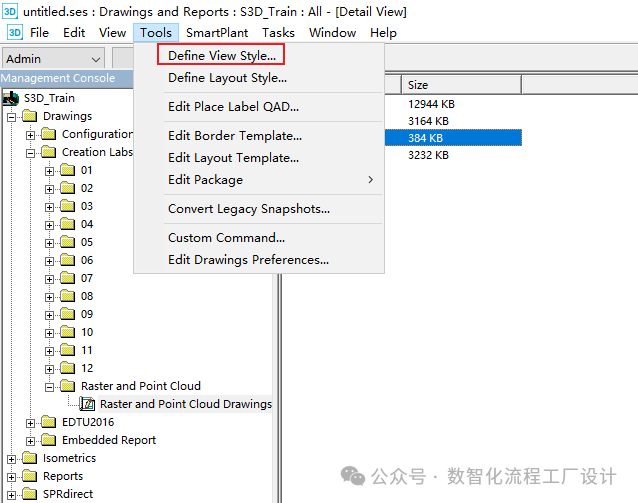
1.打开Forte 3D,切换到Drawings and Reports模块,点击ToolsDefine View Style。
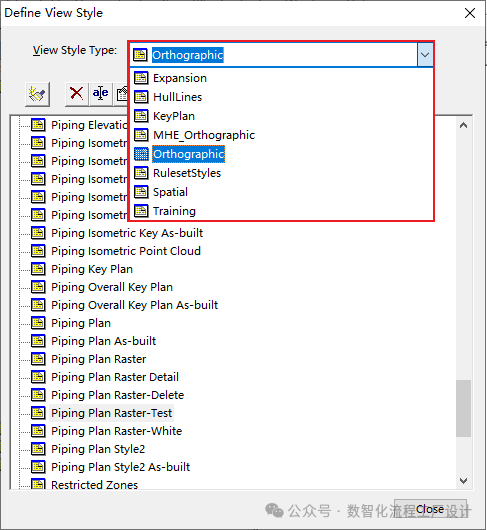
2.在弹出的Define View Style界面中,根据需要切换View Style Type。
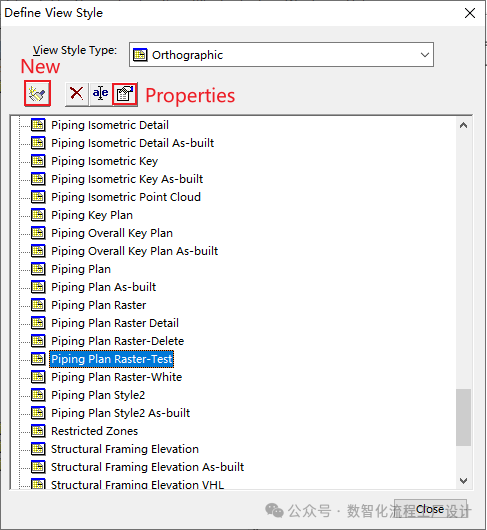
3.切换好View Style Type,可以点击下方的“New”新建一个View Style,也可以选中一个已有的View Style点击“Properties”进行修改,本次演示选择对已有的风格包进行修改的方式。
4.在弹出的View Style Properties界面中,将Render Mode改成Vector + Raster。
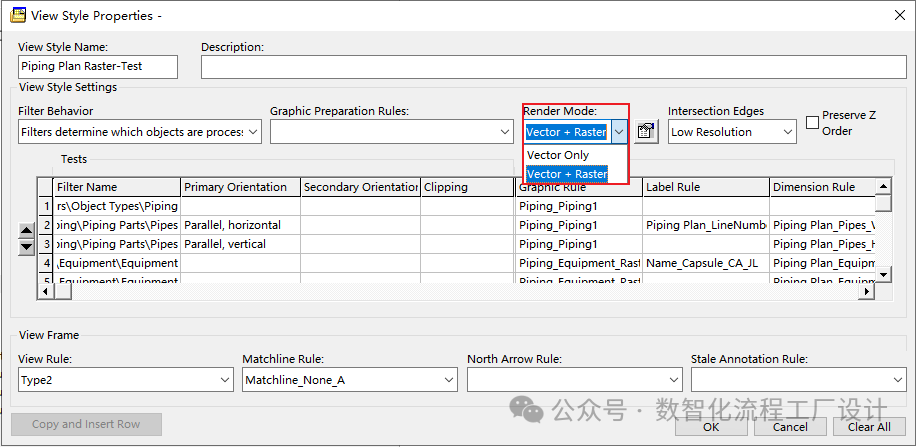
5.另外可以使用Render Mode旁边的Raster Setting来设置图纸的清晰度和背景色。
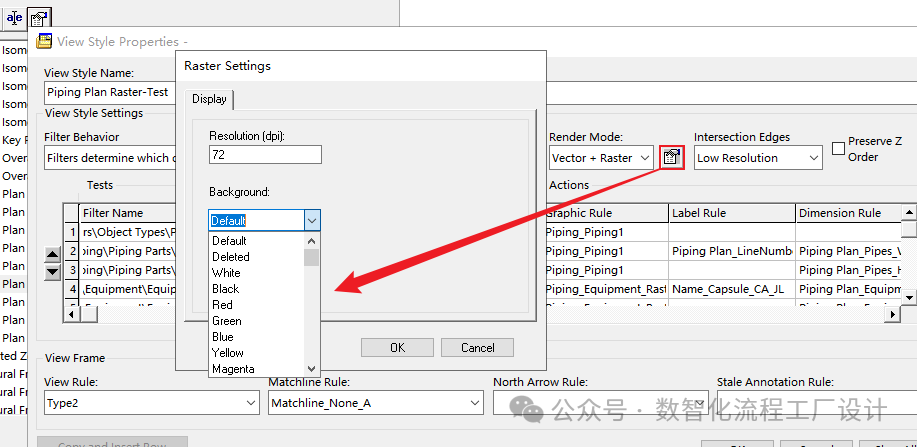
Note1:默认的DPI值为72,可以根据需要进行调整,但当DPI过高时,图纸Size会很大,打开有点慢,如果是点云的光栅布置图,那么DBI值设置不应与点云模型的点密度一致。
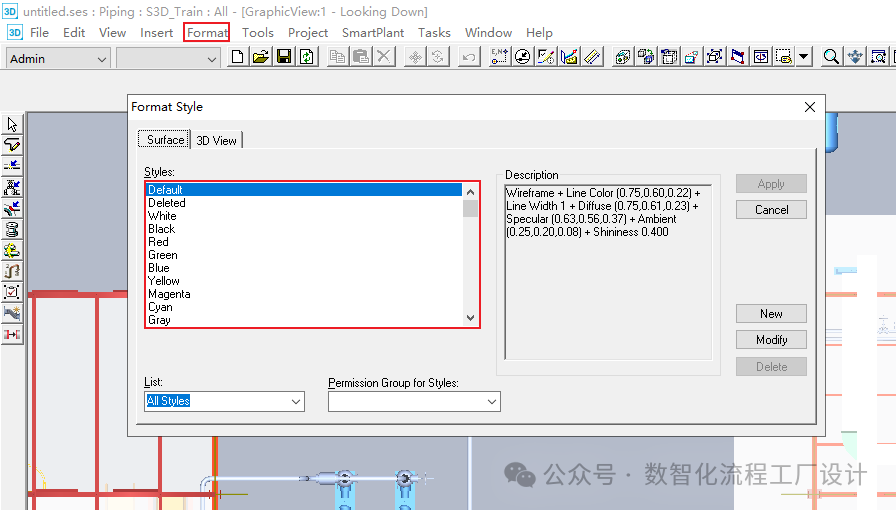
Note2:此处使用的的Backgound,为FormatStyle中的Surface Style,可以在Format Style界面中进行修改和新增。
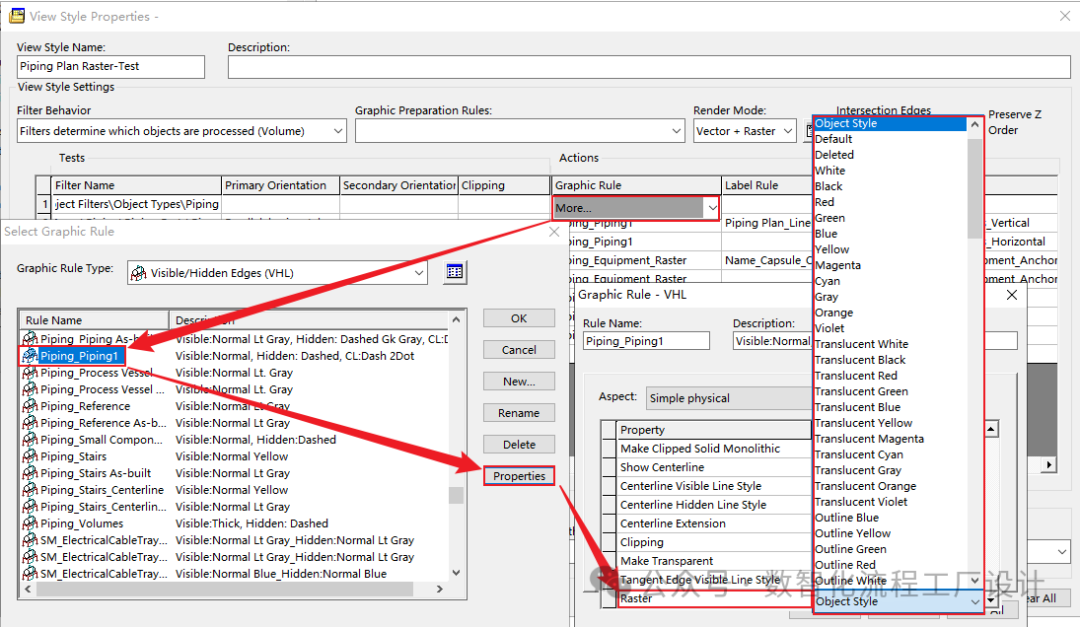
6.选择要更改显示对象的Graphic Rule,点击More…加载Select Graphic Rule界面,在Select Graphic Rule界面中找到想要使用的Graphic Rule,选中并点击Properties加载Graphic Rule-VHL界面,在Graphic Rule-VHL中的最底部找到Raster属性,并将值设置为Object Style,除None,Background,Object Style外,其他值Format Style中的值。
-
None – 不对该物体进行渲染
-
Background – 使用Raster Settings中Background的颜色对该物体进行渲染
-
Object Style – 使用模型中物体上的颜色信息进行渲染
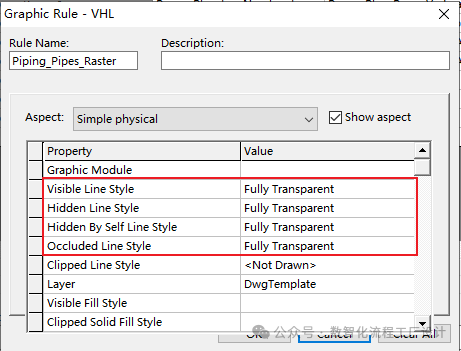
7.此外也可以根据需要设置模型边框的颜色,如果不想显示模型的边框颜色,可以将线型设置为Fully Transparent。
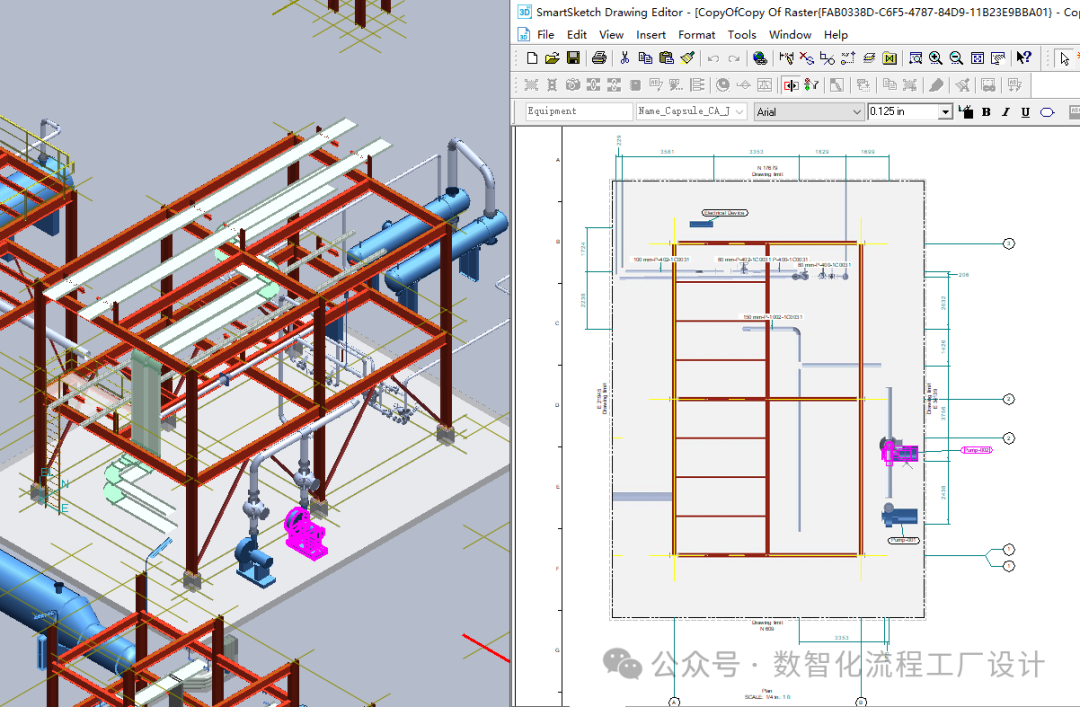
8.使用做好的View Style创建Composed Drawing并更新,即为Forte 3D模型的光栅布置图。
END
本期微课到此为止,我们下期再见。